 Public domain image from
https://cc0.photo/2016/01/26/code-editors-windows-10/
Public domain image from
https://cc0.photo/2016/01/26/code-editors-windows-10/
Godot Engine is an up-and-coming 3D and 2D game engine that is free, and open source. It competes with the likes of Unity and Unreal Engine but right now — while it’s simple and easy to learn as well as fun to use — it doesn’t quite blow away folks on the graphics side of things who are used to high end tools. (That is changing rapidly with every new version!)
However, it has an extremely interesting feature in that the very UI of the application itself is a “Godot Game.” Meaning they used the same rendering engine to render the IDE as they do to render any given game.
This is a brilliant move on their part, and it makes accessible to anyone using Godot a pretty useful set of UI tools to build simple applications. You probably won’t use it to create the next SnapChat or PhotoShop, but when it comes to game-centric applications, Godot Engine is a extremely useful and versatile way to prototype apps.
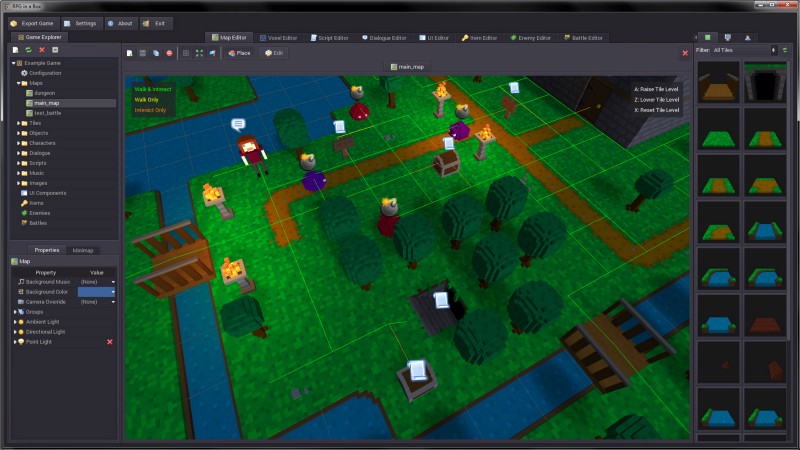 RPG in a box is being created using Godot Engine
The game tool called RPG in a box is being created using the built-in components of Godot Engine along with lots of custom components created specifically for this unique tool. The fact that the core engine remains the same while having a completely new UI is just one of the many strengths of Godot Engine.
This article will discuss my own efforts to create a simple application using Godot Engine — specifically an RSS reader. It’s probably one of the more common simple applications one might create for a given framework — which tests out things like networking, parsing, rendering, and saving preferences.
I was surprised to discover that no one (that I could find) has done this before using Godot Engine, so I was excited to try my hand at not only learning about Godot Engine as an app building tool, but how to use it for just anything as I’ve not yet created a game with it.
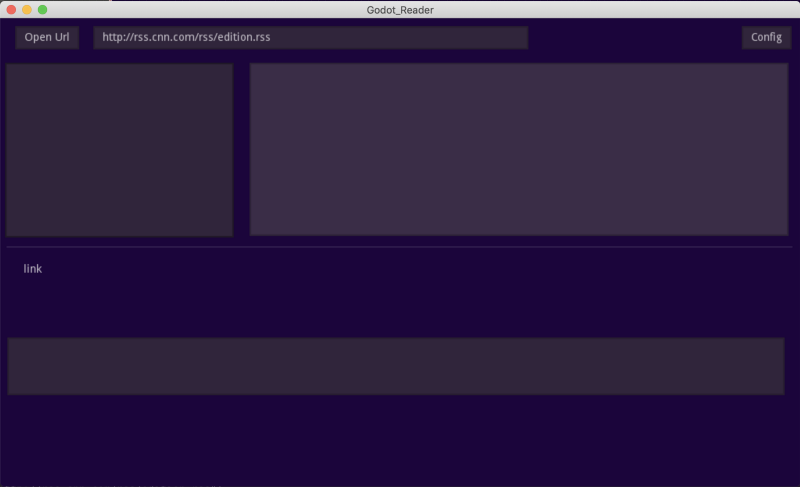 What we will be building
So, as they often say in YouTube videos, let’s get started.
First off, go grab a copy of Godot Engine. I recommend getting the latest beta, because there are several UI improvements and features that make it easier to build apps. I will be using Godot 3.1 Beta 6. Go download the latest version (most likely 3.1 will be out by the time you read this, so you can download it from the standard location.) There’s already a Beta 7 released before I finished this article!
Next, open it up and you’ll see a probably empty list of projects. Mine has a few more projects as I’ve been working with Godot for a while.
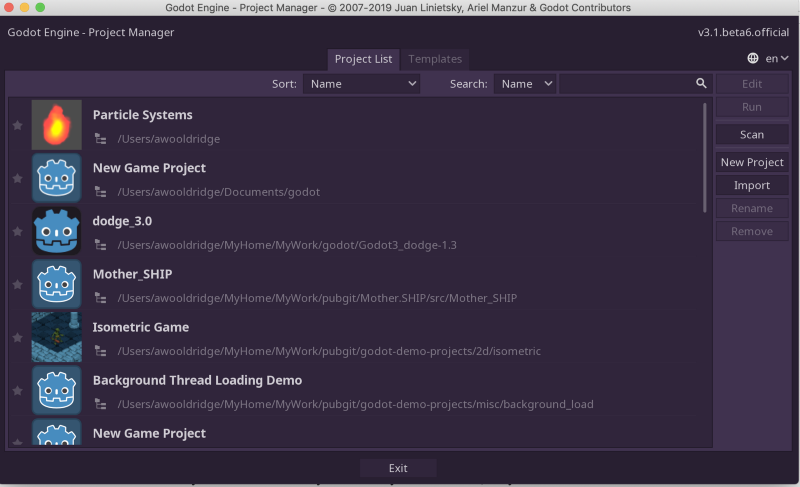
If you look to the right, you’ll see a vertical column of buttons. One of them says “New Project”. Let’s click on that.
You’ll see a new window pop up with a directory listing. Choose a project name and a folder to save things into.

Leave the other settings like the renderer alone for now. As you learn more about Godot, you can change those to suit your needs. (However, if you are on a slower machine, you might want to switch to OpenGL ES 2.0)
This is what I came up with:
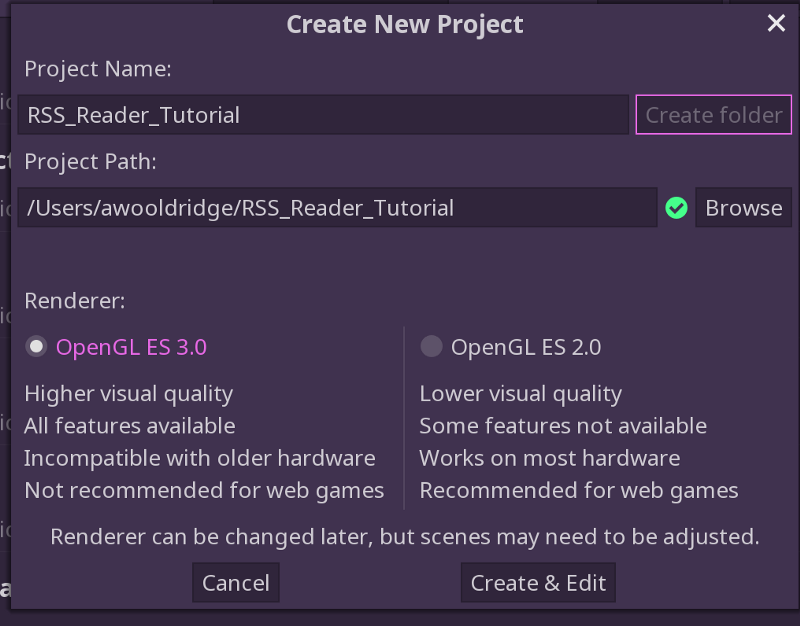 My setup for a new project
Now hit “Create and Edit”.
You’ll see a big screen with a lot of stuff. If you are new to Godot, this will seem pretty overwhelming. We will stick to a few concepts and walk through things step by step, so don’t worry about understanding everything right now.
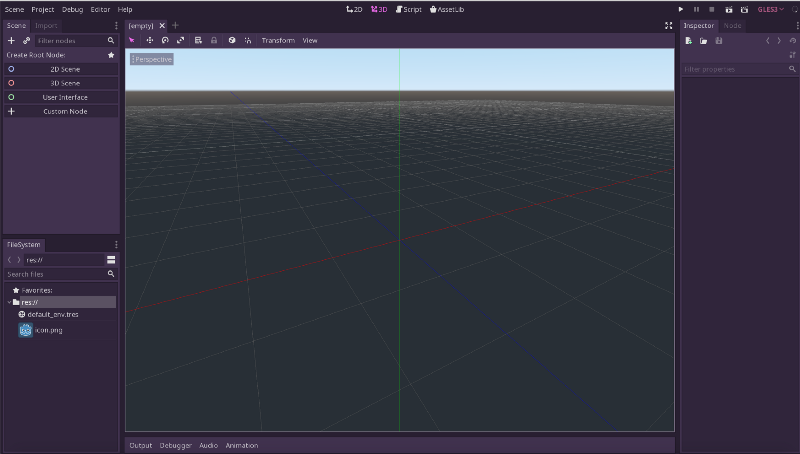 I have a purple theme set, so you might see a different shade for your
background
I have a purple theme set, so you might see a different shade for your
background
Since we are creating an app, we aren’t going to concern ourselves with the 3D world. Perhaps someday when I get more proficient with Godot myself, I’ll integrate 3D into app building! For now let’s look at the links at the top:
 Our main views in Godot
You have an integrated engine that lets you put 2D in 3D, 3D in 2D and any combination thereof. At the top we have a 2D panel, a 3D panel (what you get by default when you start a new project), a Scripting view (we will get to that) and an Asset Library.
Let’s take a moment and click through each tab, ending with the “AssetLib”. Here’s what you might see below.
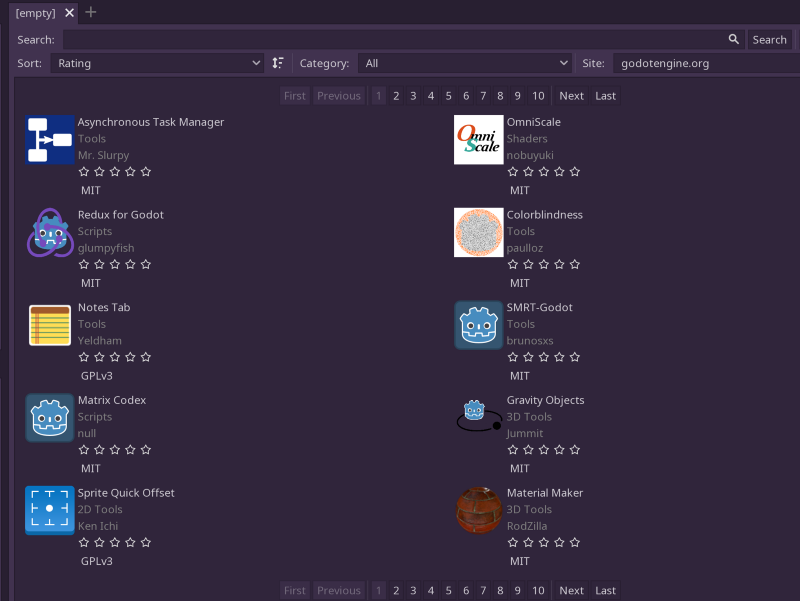
The asset library allows you to find pre-built components and code to add to your project. We won’t be using it in this tutorial, but in the future, we may try some out and see what kind of features they have. It’s an excellent way to add functionality to Godot without having to submit pull requests to the main codebase, and you can learn a lot by looking at the source code to many of these.
Back to coding!
Let’s click on the “2D” tab.
You should see something like this:
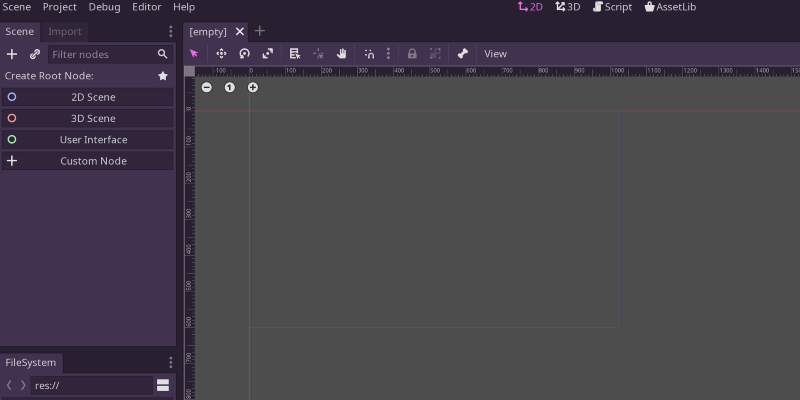 Our 2D blank view — ready for coding!
This 2D view is going to be the place we create our user interface for our RSS Reader. On the left hand side we see a “Scene” tab. Below that is a “FileSystem” tab, and to the right is an “[empty]” view tab. Let’s go over each one.
First off, the Scene tab.
Every Godot project consists of composable objects that live inside a “Scene”. A Scene is just the visible aspect of a nested tree of objects you create. Godot has a very comprehensive collection of objects — all hierarchically organized so that properties of a more lower level object are inherited by higher level objects. This really gets at the core of why Godot is really a powerful engine. The sooner you begin to understand how you can just toss together some objects, create a scene, and run, the sooner you will be successful at building Godot projects. And — get this — any scene can itself become an “object” (or instance) that you place in another scene! So you might make a “monster” scene with all kinds of interactivity, graphics, collision detection, etc. and instead of having to have multiple copies of the code in a main scene, you can just “instance” that scene in another level scene and when you go and make changes to the “monster” scene, all the instances will automatically update to pick up those changes.
Secondly, the Filesystem tab.
This tab displays the contents of the files available to this project. There is
a special url called res:// that represents the resource directory for our
project. It’s like a virtual file system that the project can read from.
Let’s go back to the Scene tab.
For this project we are going to focus on the User Interface nodes. Let’s click on the green circled “User Interface” as our Root Node. This node will be the trunk of our tree of nodes and serve as the node that we will attach a “Script” later on.
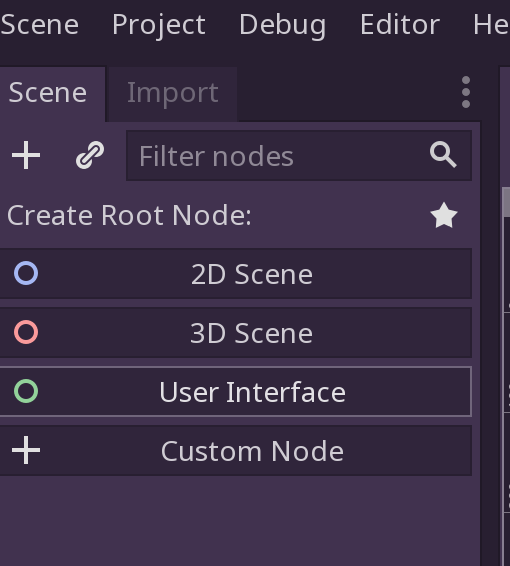 Pick User Interface to get started
Now you will see a red box in your 2D view, and a node called “Control” in the Scene tab.
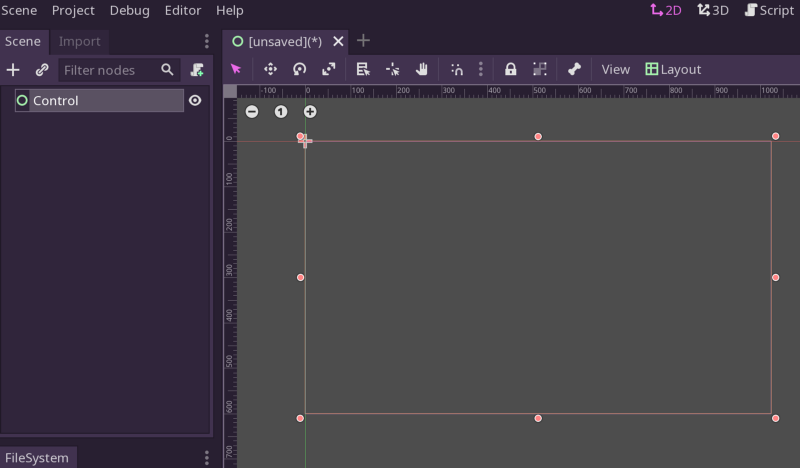
One of the things I love about Godot is that you can just play around without much worry about “breaking” things. We have done enough already to have a working project (amazing right?) so let’s try out this empty scene that we’ve created.
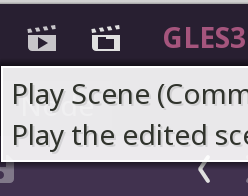
 Ways to play scenes
In the upper right hand side of your Godot interface you’ll see a number of icons. The big triangle allows you to play the project — but we’ve not set a default scene yet, so don’t click that one yet. Instead, the one that looks like a movie clapboard with a tiny arrow — click that one and Godot will try to play the current scene you are working on. This is super useful and allows you to jump around and play specific scenes without messing with the “default” scene that you might run the full application with.
If you see this:
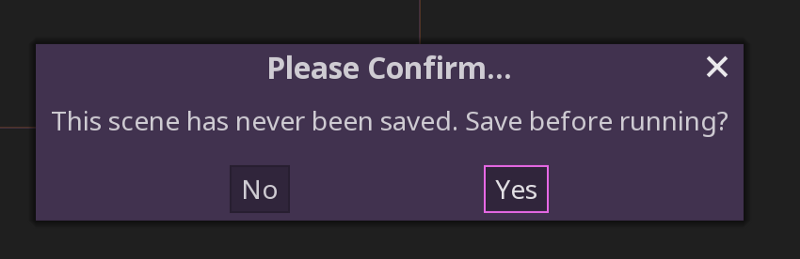
Go ahead and save this scene. I called my scene rss_reader.

What you will see next depends on your operating system, but for me on MacOS I see this:
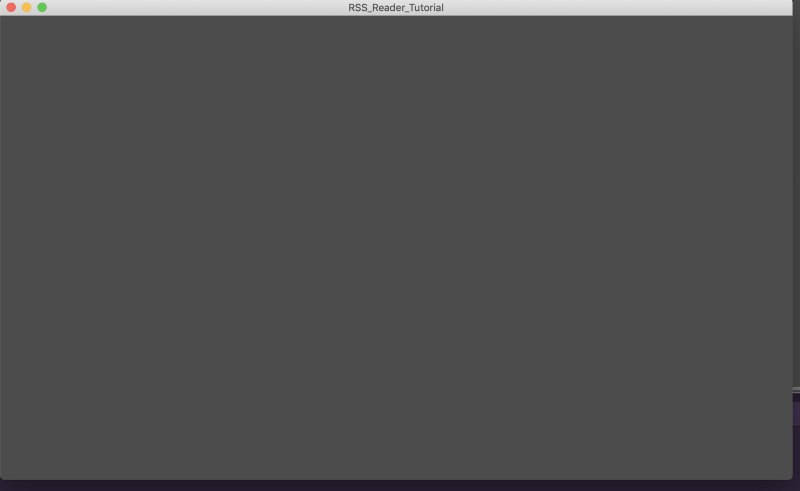 Not super interesting, yet.
So, that’s either really not interesting to you yet, or super amazing given that we’ve got a fully operating app preview and we’ve done hardly anything yet! Godot has compiled this scene, set up the application, and has it ready to preview in seconds!
Frankly, if you’ve gotten this far — then the rest is going to be details. We will be editing nodes for scenes, creating UI components, writing some scripts, and wiring up events. If you have a background in web development, it will serve you well here. But after we take a new step, you should hit that preview scene button often.
Another thing you might notice back in the Godot editor is a panel called Output at the bottom of the screen. This panel gives you debug information, feedback when your code is not working right, and other useful things that we will go in to in detail. For now, check it out:
 Yay! Preview worked!
When you preview scenes, debug mode is automatically set. You can turn that off later in your project settings, but we’ll leave that alone for now.
Notice that the buttons in the upper right have changed:

It’s very much like a video player now. You can reload the scene with the circular arrow, stop it (close) with the square, pause the game with the two bars, and play the whole project instead with the big arrow button.
You can either close the window directly, or hit the square for now.
Save your project.
Let’s change the name of the “Control” node to something more descriptive.
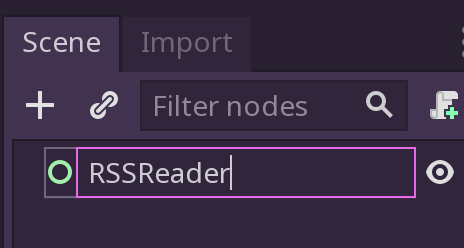
We can rename nodes to whatever we like and it doesn’t affect their behavior, but it is useful later when we need to refer to them in code.
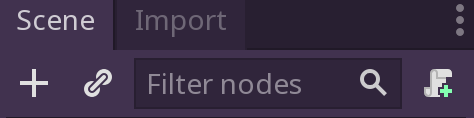
Now, let’s add a button to our interface. We will use this button to fetch our RSS feed. Press the “+” under the Scene tab and you will see this dizzying collection of nodes:
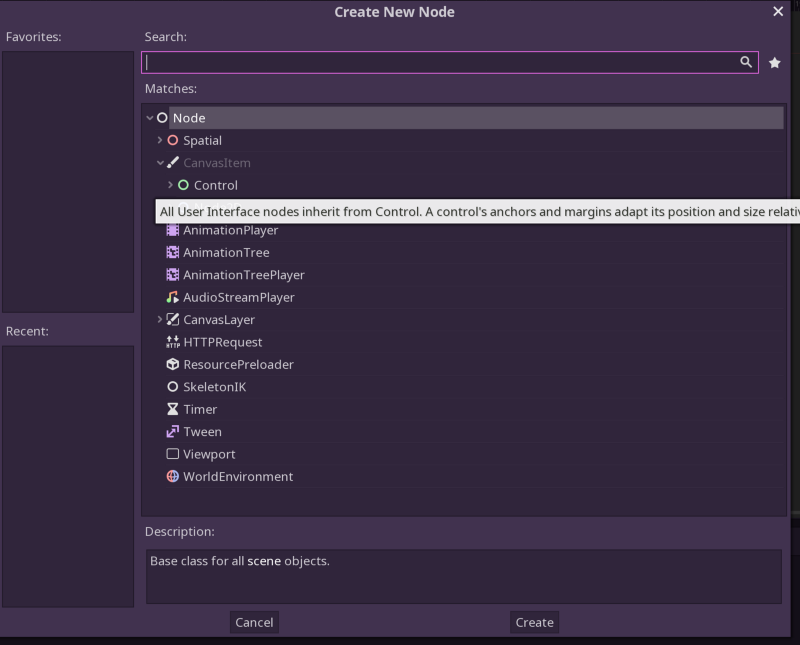 So many nodes. So little time!
First off, take a deep breath and try not to be overwhelmed. There’s a lot here to learn, and it’s beyond the scope of this article to go into each node. Suffice to say there’s a special node for just about anything you want to create in a game.
The main idea of Godot is to logically organize your game into scenes, which are composed of these nodes. As well as subscenes that live inside container scenes. It’s all super organized and well thought out.
For our use, we are going to stay focused on the Control nodes. Godot uses these control nodes to even create the interface for Godot itself! That’s pretty awesome as if you want to augment the UI of the game engine in the future, you use the same skills you develop as you create a game.
Now then, let’s find that button.
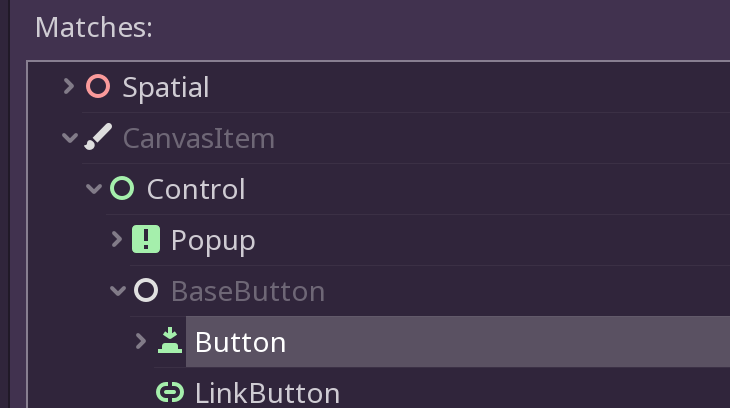 Found the button!
You can either click to expand the hierarchy of nodes, or there’s a search box at the top if you happen to know the name of the node you want.
After we find the button node, click “Create” and you’ll see that there is now a “child” of your control node called “Button”. And in the UI you’ll see a tiny new box in the upper left hand corner.
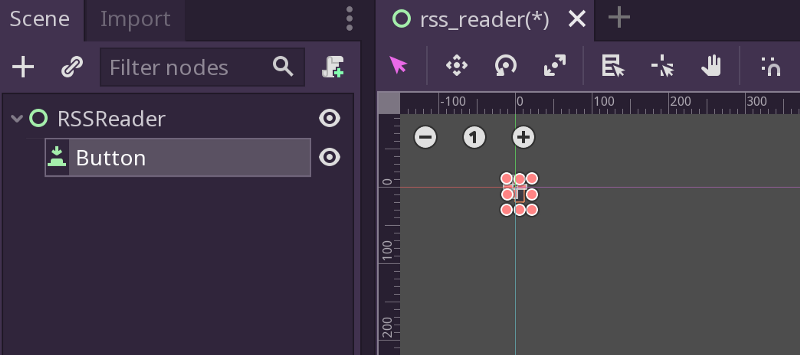 Our brand new button
Now a button that small is not going to be useful to us. Let’s take a look at another component of Godot engine that we will be making extensive use of.
On the right we’ll see an “Inspector” tab. Like the one below:
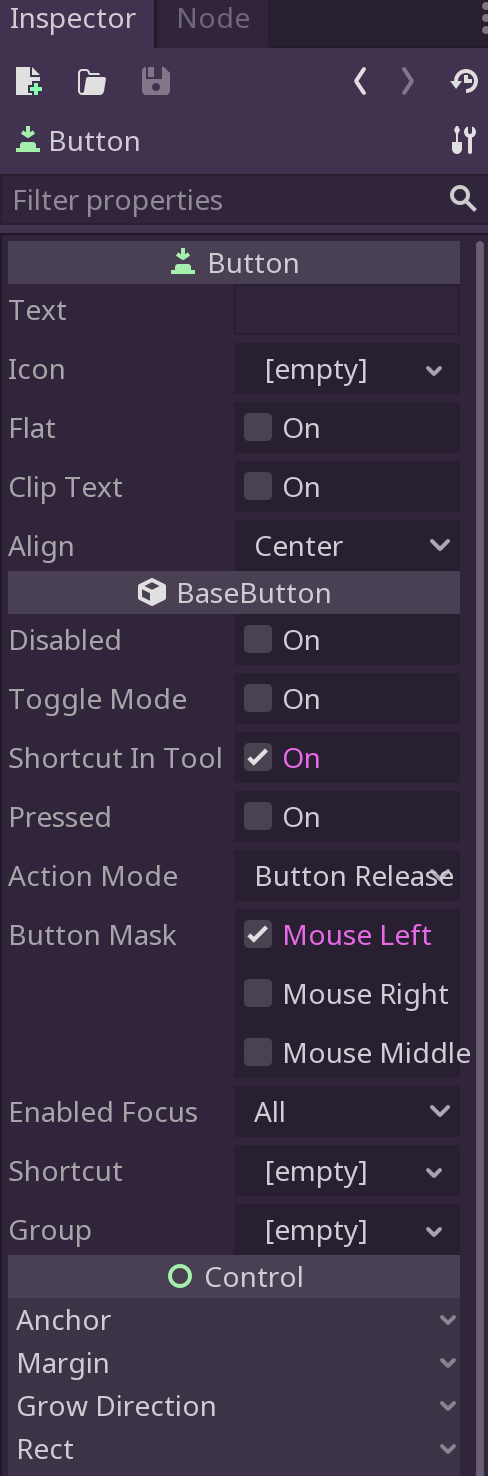
This tab changes based on the node or scene we have currently selected. It allows us to change properties and values of that node, and the types of properties change based on the type of node. The property tab is also hierarchical. The top most properties are the ones specific to that node. Then you see “Control” properties. Those are shared with all other Control nodes. Below that are “CanvasItem” and finally “Node” properties.
Godot is very good about organizing information about components, and this is one of the reasons why I personally like this engine so much.
Anyway, let’s move on.
Type “Open” in the “Text” property under the “Button” header.

You’ll see the button change in the Scene as well:
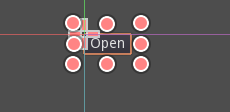
Zoom in a little, and drag the button a little bit down and to the right. Then press the Play Scene button to try out your change:
If all has gone well, you now have a button that we can use to click on to fetch our RSS feed. Click on the RSSReader node again and click “+” once more. We are going to add a text field to our UI to show the results of fetching the RSSFeed from the internet. You have to click back on the top level (RSSReader) node again because whatever node you have focused will be the parent of the new node you add to the scene. And we don’t want the textfield to be a child of the button.
This time instead of clicking around, type “textedit” in the search box. You should see something like this:
 Found it!
Hit “Create” then move it around a bit and resize it using the little red dots.
This is what I came up with so far:

Now, we are going to talk about the third aspect of Godot building ( The first two being Scenes and Nodes ) which is Scripts. Scenes are like the stage that hosts Actors, which are Nodes. Without a script, actors would just sit around on a stage and do nothing. Scripts are the logic and “life” you give to your actors.
We have a Button now, and a TextEdit field. Let’s create a Script that will glue them together along with some logic inside our app.
If you remember, we had Script as one of our possible views at the top of the Godot interface. Right now if you click on that label, you’ll see a big empty panel. Scripts can be associated with Nodes, or they can just be on their own. We are going to associate a Script with our Control node, so that we can add logic to our Button and TextEdit field.
Choose the Control node and look at the UI above it. There is a little script shaped icon with a plus next to it.
 See the little script with the green plus?
A window will pop up with lots of fields. Mine looks like this:
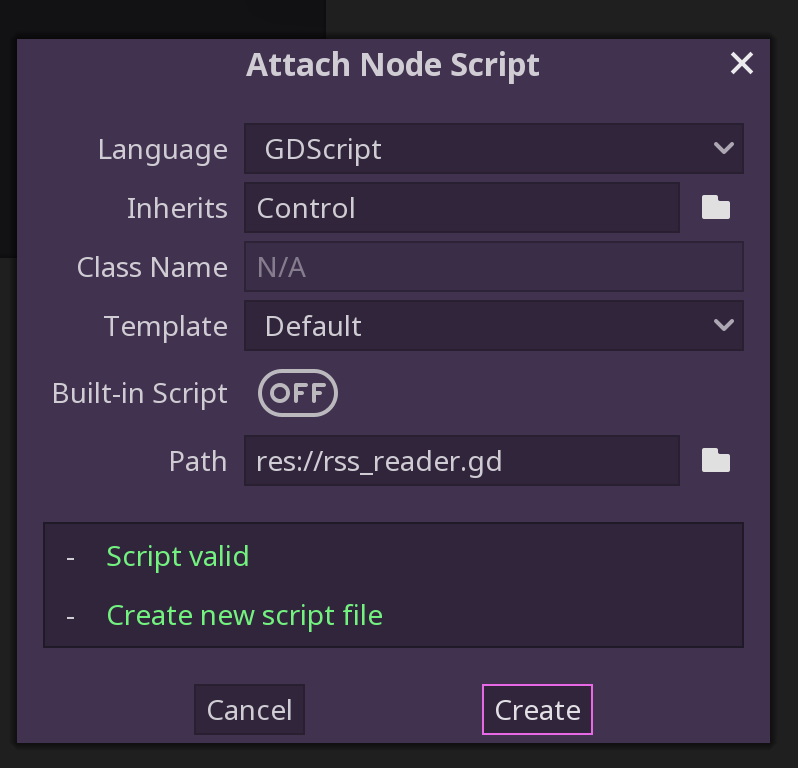
Godot has a number of ways to write scripts. The best way, in my opinion, is GDScript. It’s a Python-like language that allows you to hook logic together with node properties. There’s a ton of things to learn about GDScript, but for now let’s start with the basics.
Hit “Create” and look at the result:
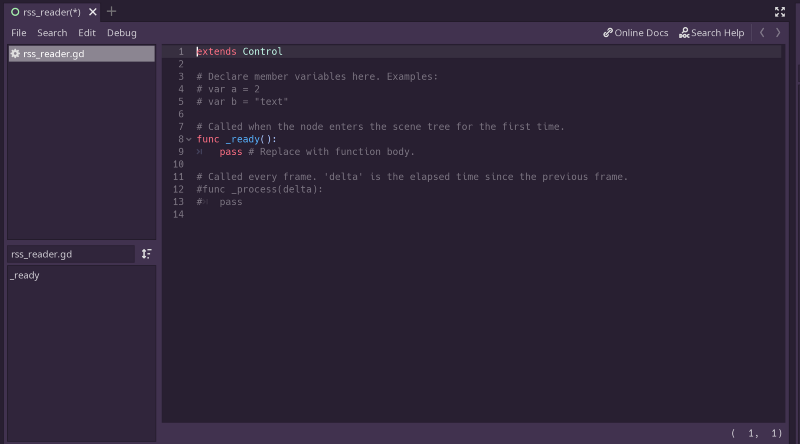 Our first script!
You’ll see the name of the script in the upper left. Godot pre filled some functions for us because we told it to in the previous dialog. We could have told it to open a blank script, but that’s not super helpful when we want to get up and running fast.
At the top of the script you see
extends Control
this just tells Godot that this script will be able to use all the properties
and methods from Control.
Next you’ll see some # var something lines. The # means comment. We’ll use
this a lot in the future to make sure our code is properly understandable.
Then, we see a func _ready(): statement. Let’s explore this a bit. The func
declaration means this is a new function. A function is just a collection of
code that’s named in the script and you could possibly pass arguments to it, but
we aren’t in this case so the () is empty. There are special functions inside
Godot that execute at certain times. _ready() runs after the code has entered
this node and everything has been set up and is ready to go. It’s like the
main() function in C++.
Now that we have this script generated, we have a place to work our magic! Go back to the 2D view for our scene, after saving your script first. You just have to click on the Control node we called RSSReader. What we are going to do next is tell Godot we want to listen for a specific event on the button, and run some code if that event happens. We can do this programmatically, but it’s more intuitive to do it via the GUI.
Let’s click on the button in the scene. First, let’s rename it “OpenButton” in case we want to make more buttons. This will help us remember which button it is.
Next, let’s look over back on the right hand panel. Remember the Inspector tab? There’s another one in the background called Node. This tab lets you see the kinds of events that a particular Node will emit as well as the ability to group a node with others for coding purposes. We’ll cover groups later on in another tutorial. For now look for the “pressed” event and click “connect” at the bottom right.
Once you click that, you’ll see a big dialog with call kinds of options. Make sure “Connect to Node” is RSSReader, and that “Make Function” is ON.
You can rename the function name to whatever you like, but for now, leave it as is and click “Connect”
Now, you’ll see the script view again with a new function:
func _on_OpenButton_pressed():
 pass # Replace with function body.
This function is special. It will only get invoked if — while our scene is running — someone clicks that particular button.
Let’s replace the pass line with a new method called print().
print() is like console.log() in JavaScript. Anything you pass into it will
be printed to the Output panel.
Let’s replace the pass statement ( which is like a no-op) with this:
print('Button pressed!')
Here’s what mine looks like:
Note that little arrow/line character to the left of the print statement. It
shows that you indented that line with a tab . This is important because
GDScript is like Python in that indentation matters. If you do not indent your
code properly, the editor will show an error message and your code will not work
properly.
Now that we have gotten this far, let’s test our code! Hit that preview scene button again to bring up your scene. Click the button, and look at the Output in your debugger window. Here’s what I have:
If you see some error messages, make sure you clicked on the right element when you connected things, and that your code is indented properly.
If you see the messages then congrats! You’ve successfully connected all the parts together we use often in Godot to build games and apps.
Now, we will write a function to get information from an RSS feed url and display it in our TextEdit Node.
Before we can do this, however, we need to add one more node to our Scene. This will not be a visible node, but it is essential to run the HTTP request we want to make. Everything you do in Godot centers around Scenes, Nodes, and Scripts.
Click RSSReader again and hit the “+” sign again. Then type “http” in the search box to find an invisible node called HTTPRequest. Add it to your scene by hitting “create”.
Here’s how things should look after you do this.
Switch back to your script view and add the following:

As you can see, it gives you hints about what kind of arguments your method will
need, and if you ever need to find out more about a given Object or method, you
can command+click on Mac or control+click on Windows on the method and it
will open documentation inside the editor for you to see how things work. Let’s
finish this line with the following:
$HTTPRequest.request("
")
If you command or control clicked on the “request” method of the HTTPRequest object, you’d see something like this:
Use this methodology as much as you can when you are working on Godot coding, so you can learn about the objects and methods you are working with.
Also note, the $HTTPRequest moniker is just a way you can refer to an object
in GDScript. If your object had been named FooBar, you would have typed
$FooBar to access it in script world.
Now if we ran the scene again, nothing new would happen. The reason for this is twofold. First, we need to call this new method from our button listener function. Secondly, we need to wire up an event from the HTTPRequest object. Let’s take care of these two steps.
First off, click on the HTTPRequest object in the Scene tab.
Now go over to the Node tab for this Node and click request_completed() . We
will wire up this event back into the script, just like we wired up the click
event for the button.
Click “Connect” then “Connect” on the big dialog that pops up and you should see something like this:
We will then replace the pass statement with this line:
$TextEdit.set_text(body.get_string_from_utf8())
What this does is call into the TextEdit Node we have in the scene, set its text
value to the response we get from the HTTPRequest. That response lives in the
body argument we get in the callback. We have to convert that
PoolByteArray
object to a string so that it is the right type to pass into the set_text
method.
Let’s look at our code listing now, with all the changes we have:
All the code we need so far!
With just these few lines of code, we can tell the Godot app to go fetch the data from the RSS url we provided, and pass it into our TextEdit field where it will display in our scene.
Save everything, and hit that preview button!
Hopefully, you’ll see something like this after you click the “Open” button.
We got the data!
We are reaching the end of Part 1 of our tutorial. Already we have come a long way. We have seen how to get Godot, set up a simple scene, wire up a Button to listen for clicks, wire up an HTTPRequest to emit data from a URL, and display it in a TextEdit node. This is very powerful!
I hope you have been able to follow along and get everything working. If you have any issues, please let me know in the comments.
In Part 2, we will look at the XMLParser that will help us figure out how to parse the RSS feed, and we will add new components to our scene to list stories, read the summaries, and even open a browser window with the full story!
In Part 3 we will explore adding a feature to save a setting that contains the URL we want to load when we launch the application.
I really hope you like this tutorial, and that you’ll share it around with others. I will link to the next tutorial when it’s out, so stay tuned!